
You have work tomorrow, a clear patch in the forecast, and an evening that already includes dinner and getting home. The useful question is how much of that evening can become a worthwhile session. Start with your return deadline, subtract the whole trip's overhead, and then compare the remaining time with the sky.
Set the return deadline first
Write down the time you need to be home, with tomorrow's commitments in mind. Separately record the earliest you can realistically leave with the gear ready. Finishing work is not automatically your departure time: eating, charging batteries, collecting equipment, and getting out of the door still take time.
Make the deadline concrete: “Home by 22:00” is something you can plan around. “A quick session” leaves every decision open. Set a packing alarm on your phone once you have calculated the stop time, and treat it as part of the session.
Choose one subject and one familiar spot
Pick a result you can recognize as finished: one star-field composition, a short sequence to test your tracking, or a planned Moon landscape. Estimate the continuous shooting block that makes that goal worthwhile for your equipment and experience. There is no minimum duration that suits every target.
A familiar nearby location keeps more of the evening available for that goal. Include parking, the walk to the tripod position, gates, and the view in the direction you need. NASA's location-planning guide recommends checking the local weather, Moon timing, and the usable horizon. For a new location, make a separate daylight scouting visit when possible; use our spot-evaluation checklist to record what you find.
A farther, darker site can still be worthwhile. Compare the extra travel with the useful shooting time it leaves, then choose the location that fits this evening's subject. If the goal is your first phone photo, keep the setup simple with the iPhone star-photography workflow.
Build the time budget backwards
Estimate each leg separately. Your return trip may take a different amount of time from the outward journey. Include setup and focus checks before shooting, packing after it, and a personal allowance for delays. Use times from your own previous outings when you have them.
Ready to shoot = earliest departure + outward journey + setup.
Latest planned shooting stop = home deadline − return journey − packing − delay allowance.
That gives you an operational window. The useful sky window has to fit inside it. Start at the latest of your equipment-ready time and the opening of each condition your subject needs. Stop at the earliest of your planned stop time and the closing of any required condition.
- Darkness: choose the light level your subject needs. For faint-sky work, check astronomical darkness; the U.S. Naval Observatory defines the end of evening astronomical twilight at the Sun's center 18° below the horizon. This is a lighting definition, not a guarantee of image quality.
- Moon conditions: use the hours that suit the shot. A moonless requirement belongs in a faint-sky plan; a Moon landscape needs a different window. Our Moon-planning guide explains that choice.
- Target and horizon: check when your subject is usable from the actual tripod position. Choose the altitude and framing requirements for your equipment and location.
- Weather: compare the forecast across the proposed block, including its edges. The Met Office explains that local showers and fog cannot be placed at an exact time and location, even in short-range forecasts. Leave room to reassess.
Only apply conditions relevant to your goal. If a required window opens after another one closes, there is no overlap. If cloud splits the evening into separate gaps, assess each gap against your setup and minimum useful block rather than adding them together automatically.
Worked example: three hours, a 30-minute window
This example is hypothetical. All times are local to one imagined evening, with no clock change. The travel times, forecast intervals, and astronomical windows below are invented inputs for the calculation, not conditions for a real place or date.
| Item | Chosen value |
|---|---|
| Earliest departure with gear ready | 19:00 |
| Hard home deadline | 22:00 |
| Outward journey, including parking and walking | 25 minutes |
| Setup and initial focus checks | 15 minutes |
| Packing and getting ready to leave | 10 minutes |
| Return journey | 25 minutes |
| Delay allowance | 15 minutes |
You are ready to shoot at 19:40: 19:00 + 25 + 15 minutes. Work backwards from 22:00 and the latest planned shooting stop is 21:10: subtract 25 minutes for returning, 10 for packing, and 15 for delays. Stopping then means leaving the spot at 21:20 and reaching home at 21:45 if those estimates hold, with the allowance intact.
Now assume the chosen subject needs the following conditions:
| Constraint | Candidate interval |
|---|---|
| Equipment ready until planned stop | 19:40–21:10 |
| Astronomical darkness | 20:00–23:00 |
| Moon below the horizon | 20:20–23:00 |
| Target meets this composition's horizon requirements | 20:10–21:00 |
| Forecast conditions judged suitable for this setup | 19:45–20:50 |
The latest opening is 20:20; the earliest closing is 20:50. Their overlap is a 30-minute candidate shooting window. The 180 minutes between leaving at 19:00 and the 22:00 deadline are not 180 minutes of photography.
Even that 30-minute window is not a promise of 30 minutes of collected exposure. Test frames, focus checks, composition changes, and interruptions use part of it. If you pack at 20:50, the example's 10-minute pack and 25-minute return put you home at 21:25, provided those journeys go as estimated. You can finish early; unused time does not need to become another target.
Compare the window with the goal you chose. If your minimum useful block was 20 minutes, the plan has room to try it. If it was 45 minutes, choose a different goal or evening. If setup slips until 20:40, only 10 minutes remain before the example's weather window closes: recalculate before starting.
Copy this session worksheet
Save these fields in a note and fill them in before leaving. Use one date and the observing location's local time throughout; if the plan crosses midnight, label the dates too.
- My one goal: subject, composition, and what counts as finished.
- My minimum useful shooting block: chosen for that goal and setup.
- My location: tripod position, access, and subject direction.
- Earliest departure / hard home deadline: two actual times.
- Outward / setup / packing / return / delay allowance: five separate durations.
- Equipment-ready time / latest planned shooting stop: calculated from those inputs.
- Required sky windows: light level, Moon, target/horizon, and weather.
- Candidate overlap: latest opening to earliest closing.
- Decision and fallback: fits my goal, change the goal, or leave it for another evening.
- Packing reminder: the planned stop time, with the return allowance protected.
Decide the fallback before leaving
Choose one alternative that uses the same location and equipment. If faint-sky conditions fail but the Moon is usable, a lunar composition or an observing session may suit the remaining time. NASA's Moon-viewing advice notes that the Moon can be observed during any illuminated phase. Check whether its direction and timing actually fit your spot.
A fallback can also be a nearby practice session or staying home. Avoid adding a second drive or a new equipment setup unless you redo the budget. For the wider conditions decision, use the Tonight go-or-no-go checklist.
The leaving-home and packing-up checklist
- Before leaving: charge batteries, pack the chosen setup, confirm access, recheck the forecast, and save the completed worksheet.
- On arrival: check the actual sky and horizon, then compare the current time with your equipment-ready estimate.
- Before the first sequence: confirm that the remaining overlap still fits your goal. Start the packing reminder.
- At the planned stop: finish the sequence in time to pack, check the spot for equipment, and begin the return journey.
- Back home: record actual travel, setup, and packing times. Use those observations to improve the next budget.
The repeatable gain is a better estimate of your own evening. A small, familiar setup and a known location make those estimates easier to reuse the next time a clear window appears.
Use DarkScout for the sky part of the plan
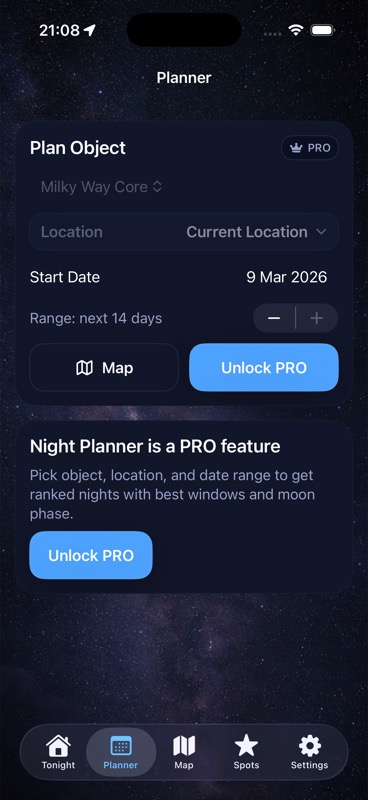
DarkScout's Tonight view, Moon conditions, planning tools, and saved-spot comparison can help you choose the candidate window and location. Keep your travel budget and return deadline alongside that information in your note, and use your phone's reminder or alarm for packing time.
The current App Store listing describes free access to all features, up to 14 nights of planning, and saved observing spots. DarkScout requires iOS 26 or later. The worksheet above also works with your preferred forecast and sky-time sources.
Find the window that fits your evening.
Compare the night and your saved spots before you pack.
Get DarkScout for iPhone All features free · iOS 26 or laterSources and further reading
Published October 16, 2026. Astronomy, forecast, and product references checked for this guide. The worked example is a scheduling exercise and uses no real forecast or location.